Overview of Units in AutoCAD
Step 1: Access the Units Command

Step 1.1
Step 1.2
Step 2: Configure the Drawing Units
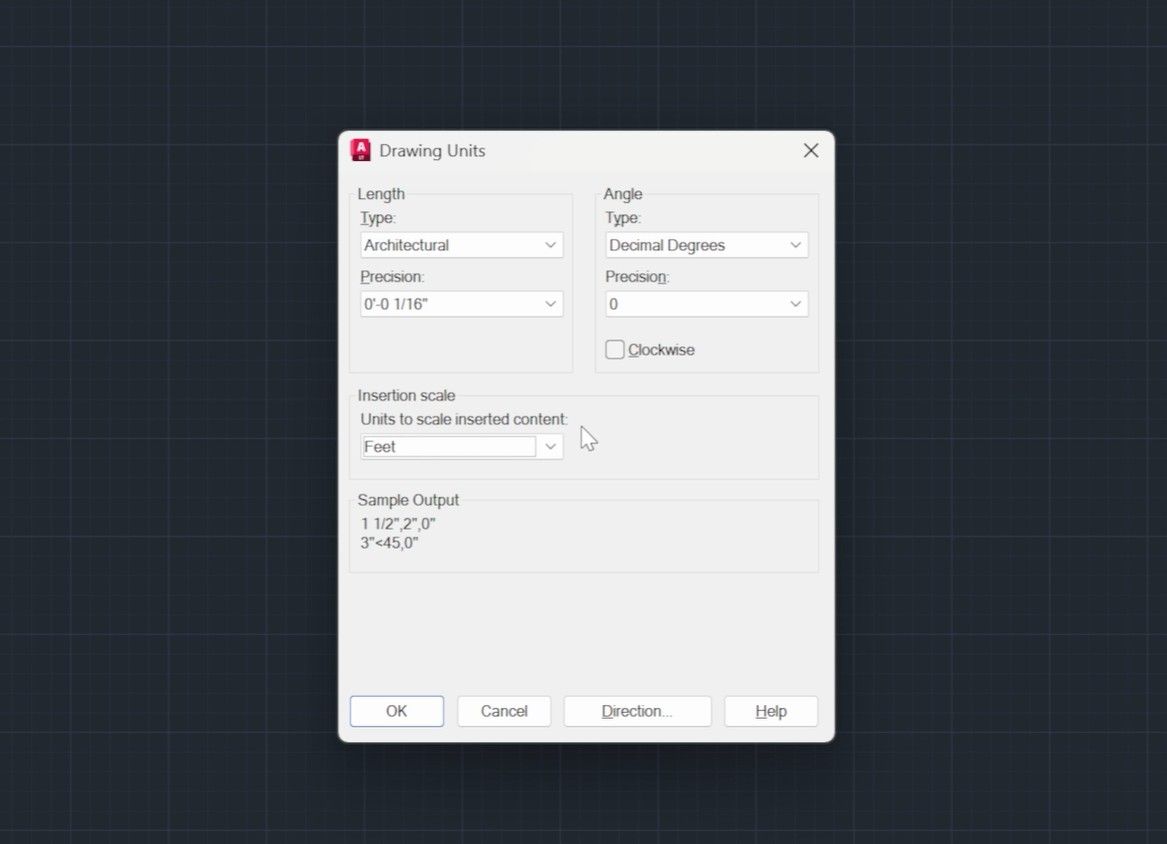
Step 2.1: Set the Length Type
Step 2.2: Set the Insertion Scale
Step 2.3: Press Okay to Apply Settings
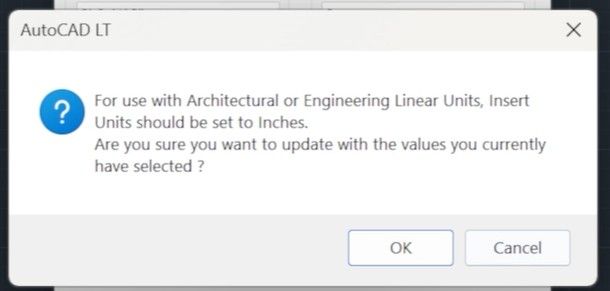
Step 3: Confirm Insertion Unit Settings
Step 3.1: Confirm with “OK”
Best Practices for Managing Units in AutoCAD
How to Learn AutoCAD to Create 2D Landscape Designs
Frequently Asked Questions
How do I change units in AutoCAD?
What is the default unit in AutoCAD?
Why are my AutoCAD drawings the wrong scale?
Can I switch between metric and imperial units in AutoCAD?

Copyright © 2025