Related Course - AutoCAD for Landscape Design
Learning how to scale in AutoCAD is one of the most fundamental yet often misunderstood steps in the landscape design process.
Many designers find themselves stuck when an imported image or survey doesn’t match real-world dimensions, wasting hours trying to fix what seems like a small mistake.
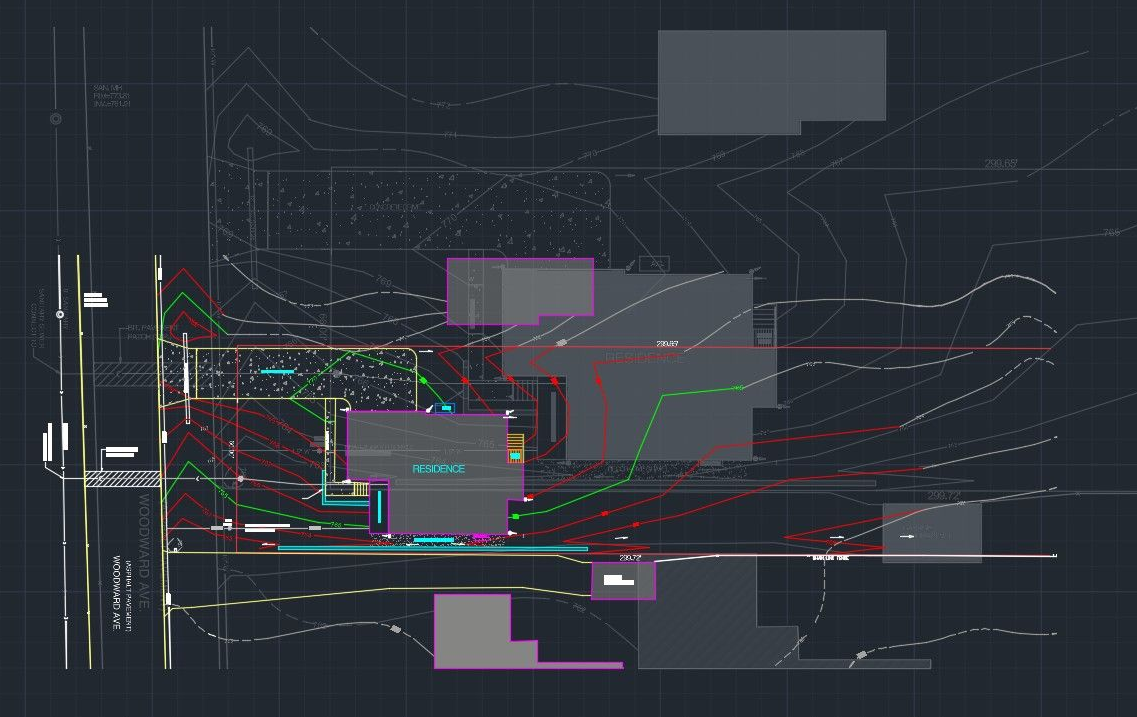
Whether you’re importing a plat of survey from a civil engineer, tracing a site plan from a JPEG, or referencing aerial imagery from Google Earth, getting your drawing to true scale is what ensures every planting bed, walkway, and elevation aligns perfectly in the real world.
In this article, we’ll cover how to properly scale a variety of documents, from image files and satellite maps to AutoCAD-based surveys, so your projects start accurately and stay that way from concept through construction.
TABLE OF CONTENTS:- Overview of Scaling in AutoCAD
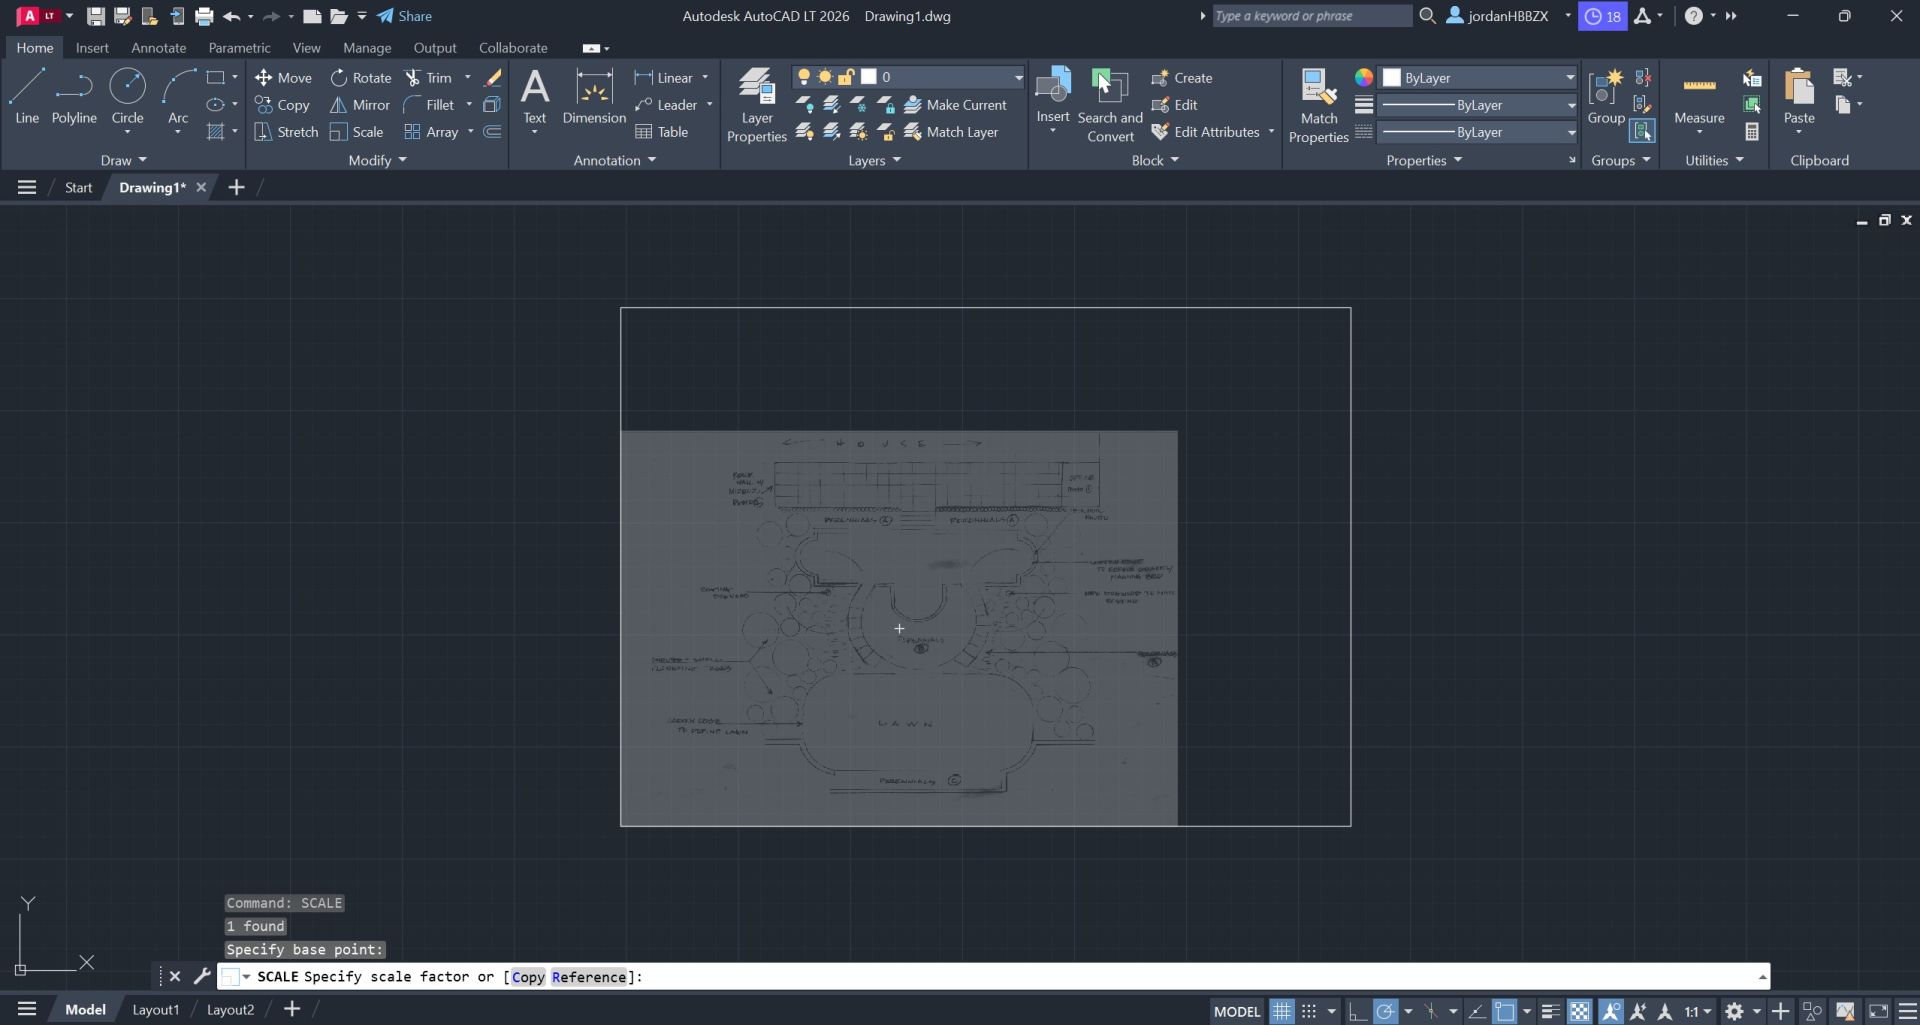
- Step 1: Starting the Scale Command
- Step 2: Selecting Objects
- Step 3: Specifying the Base Point
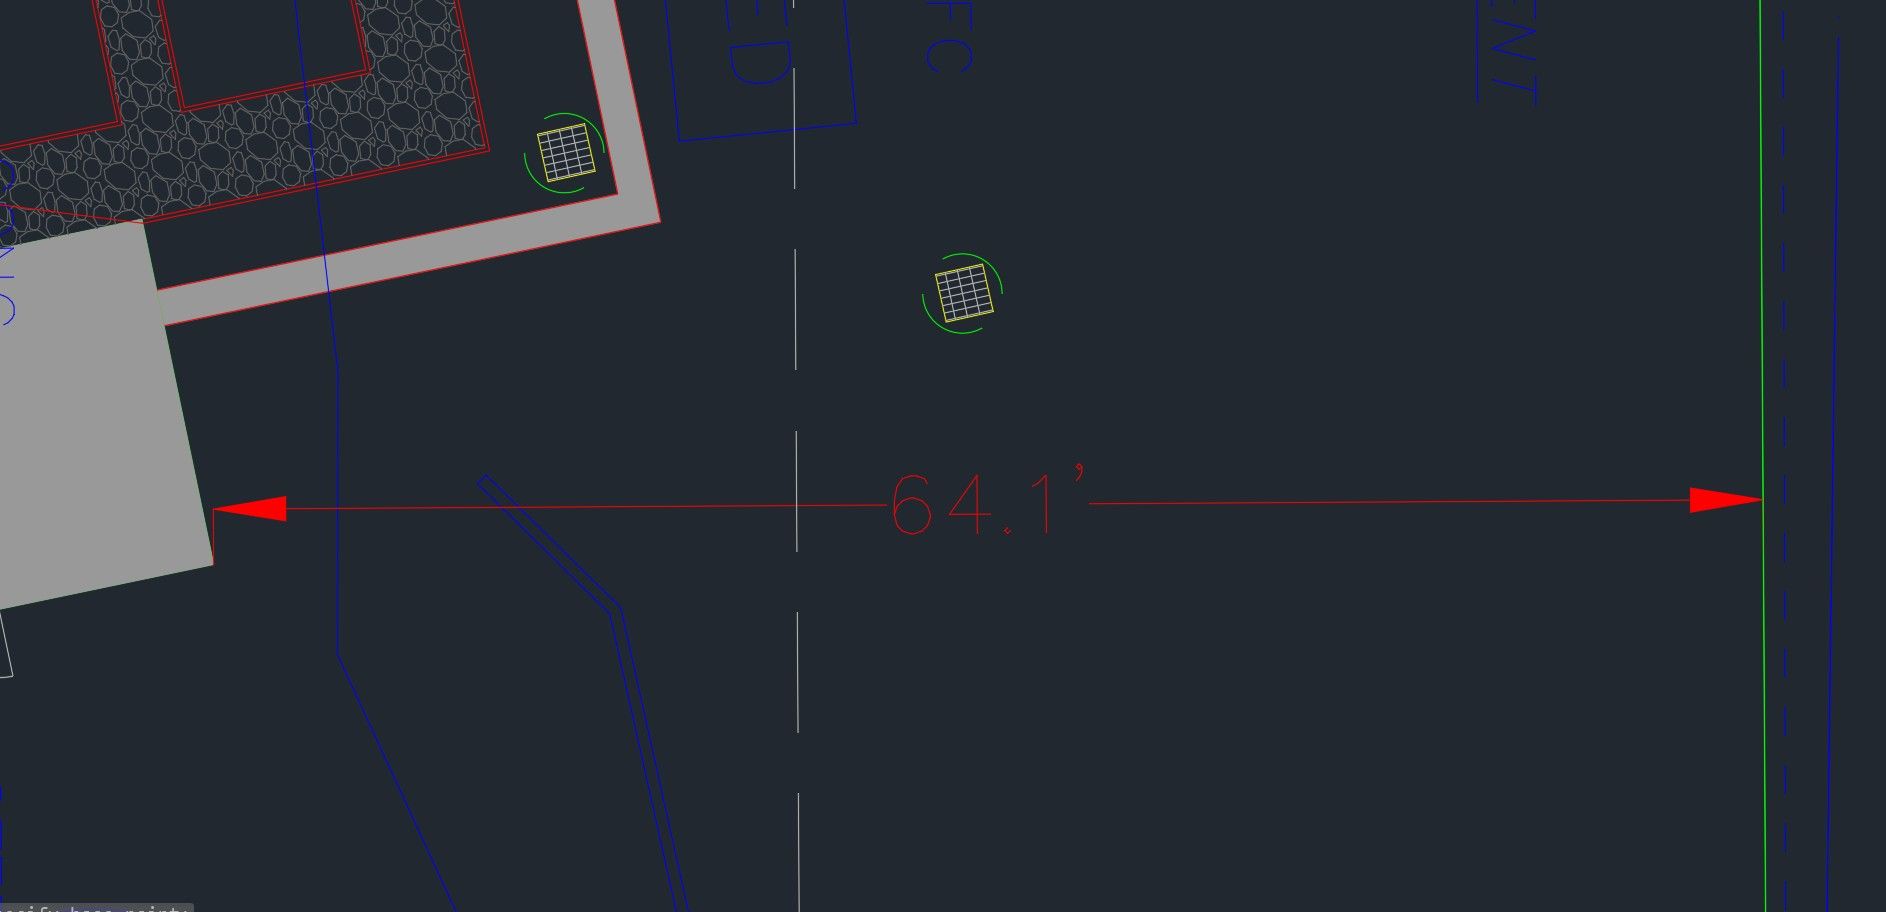
- Step 4: Reference the Known Dimension
- Step 5: Enter the Known Dimension
- Best Practices for Scaling Objects in AutoCAD
- How to Learn AutoCAD to Create 2D Landscape Designs
- Frequently Asked Questions