Jul 1 • Jordan Felber

How to Go From a 2D AutoCAD Drawing to a 3D Model and Rendering

Related — The Ultimate Bundle

For many landscape designers, a 2D landscape plan is the starting point of every project.

It is where layouts are organized, outdoor spaces take shape, and the design is refined before moving into visualization.

The question is what comes next.

The transition from AutoCAD to a 3D model is not about starting over. It is about building upon the work that has already been completed.

Professional landscape designers follow a structured workflow that moves from 2D layout drawings to modeling, rendering, and presentation.

Understanding how each stage connects makes the process faster, produces stronger visualizations, and creates presentations that communicate the design with confidence.

Why 2D Drawings Come Before 3D Models

Three dimensional modeling is one of the most exciting parts of the design process, but it is rarely the first step. Professional landscape designers solve the layout, dimensions, and functional relationships of a project in two dimensions before investing time building a model. This approach creates stronger designs, reduces revisions, and makes the entire visualization process significantly faster.

Two Dimensional Drawings Solve Function Before Form

A landscape plan is first and foremost a functional drawing that organizes how people move through a property. Walkways, patios, planting beds, outdoor rooms, and circulation patterns are easier to evaluate from a plan view than from a perspective view. Solving these relationships in two dimensions creates a stronger design before any modeling begins.

AutoCAD Makes Design Changes Faster

Moving a patio five feet, widening a walkway, or adjusting a planting bed can be completed in seconds inside AutoCAD. Those same revisions often require updating multiple surfaces, materials, and objects once a project has been modeled in three dimensions. Resolving design decisions early prevents unnecessary remodeling later in the workflow.

Three Dimensional Modeling Builds on a Finished Design

Three dimensional software should communicate a design rather than discover it. Once the layout has been finalized in AutoCAD, every wall, pool, stair, and planting bed already has a defined location and dimension. Modeling becomes a process of translating accurate drawings into a realistic spatial experience instead of constantly redesigning the project.

A Clean AutoCAD Drawing Creates a Better Model

Well organized layers, accurate scale, closed boundaries, and simplified geometry make the transition into Rhino much more efficient. Clean drawings reduce import problems while creating geometry that can be modeled with minimal cleanup. Spending a few extra minutes organizing the AutoCAD file often saves hours during the modeling stage.

Learn How to Use AutoCAD to Design Full Landscapes

Import Your 2D AutoCAD Drawing Into Rhino

If you're new to three dimensional modeling, you may be wondering what Rhino is and why you need it. Rhino is a professional 3D modeling software that designers use to build accurate three dimensional models ready for rendering. Rather than replacing AutoCAD, it builds on the work you've already completed, making it more flexible and more efficient to create realistic visualizations.

Import the DWG File

The DWG file created in AutoCAD transfers the project's geometry directly into Rhino while preserving the relationships established during drafting. Property lines, hardscape layouts, buildings, and planting areas become the framework for modeling the landscape. Because the drawing already contains accurate dimensions, very little interpretation is required.

Check Units and Scale

After importing the drawing, it is important to verify that the model matches the intended units and overall dimensions. Confirming scale early prevents errors from affecting every stage that follows. Accurate scaling also ensures that materials, entourage, and imported objects appear proportionally correct.

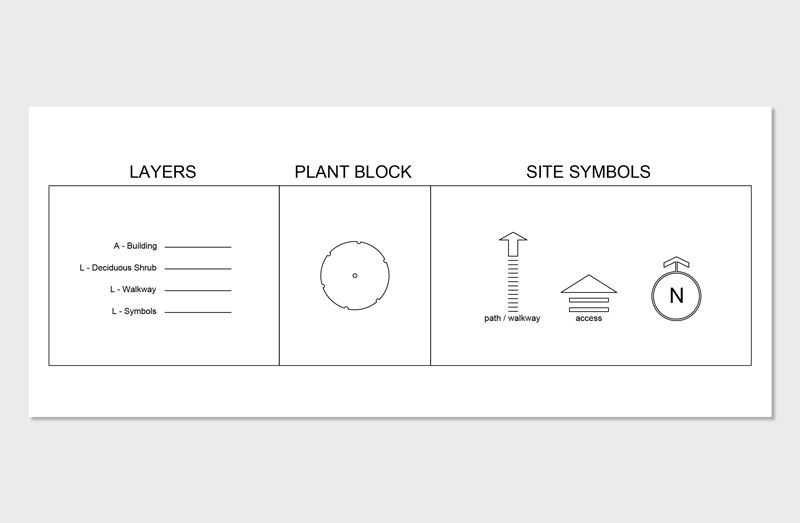
Organize the Model Layers

Maintaining organized layers inside Rhino creates a more efficient modeling environment. Separating buildings, terrain, planting, walls, furniture, and site elements allows individual portions of the project to be edited without affecting the rest of the model. This organization becomes increasingly valuable as projects grow in complexity.

Learn AutoCAD and Design Landscapes in Just a Few Weeks

Build the Three Dimensional Model

With the drawing prepared and imported, the project begins transforming from 2D layout information into a physical environment. The objective during this stage is not realism but accurate geometry that reflects the design intent. Every modeled element establishes the structure that future materials and renderings will depend on.

Model the Terrain

Terrain establishes the foundation for every outdoor space and influences how the entire landscape is experienced. Slopes, retaining walls, grading transitions, and finished elevations should accurately represent the construction drawings. Correct terrain also improves drainage visualization and creates realistic relationships between architectural and landscape elements.

Build Walls and Structures

Buildings, pergolas, fences, columns, retaining walls, and outdoor structures provide the architectural framework of the project. These elements define enclosure, circulation, and the overall character of the landscape. Modeling them accurately creates stronger relationships between architecture and site design.

Extrude the Hardscape

Patios, walkways, driveways, seat walls, and planting edges are converted into three dimensional forms using the AutoCAD layout as a guide. Giving these elements realistic thickness immediately improves the perception of depth and scale. This process begins transforming flat drawings into spaces that clients can understand.

Add Pools and Stairs

Pools and stairs often become focal points within residential landscape projects and deserve careful attention during modeling. Their proportions, elevations, and transitions should reflect the construction documents to ensure accurate visualization. Building these features correctly also improves lighting studies and rendering realism later in the process.

Learn Rhino for 3D Landscape Modeling and Photorealistic Renderings

Add Materials and Landscape Elements

Once the geometry is complete, the model begins communicating the intended character of the design. Materials and landscape elements help distinguish one project from another while giving clients a realistic understanding of the finished space. These additions transform technical models into believable environments.

Assign Material Textures
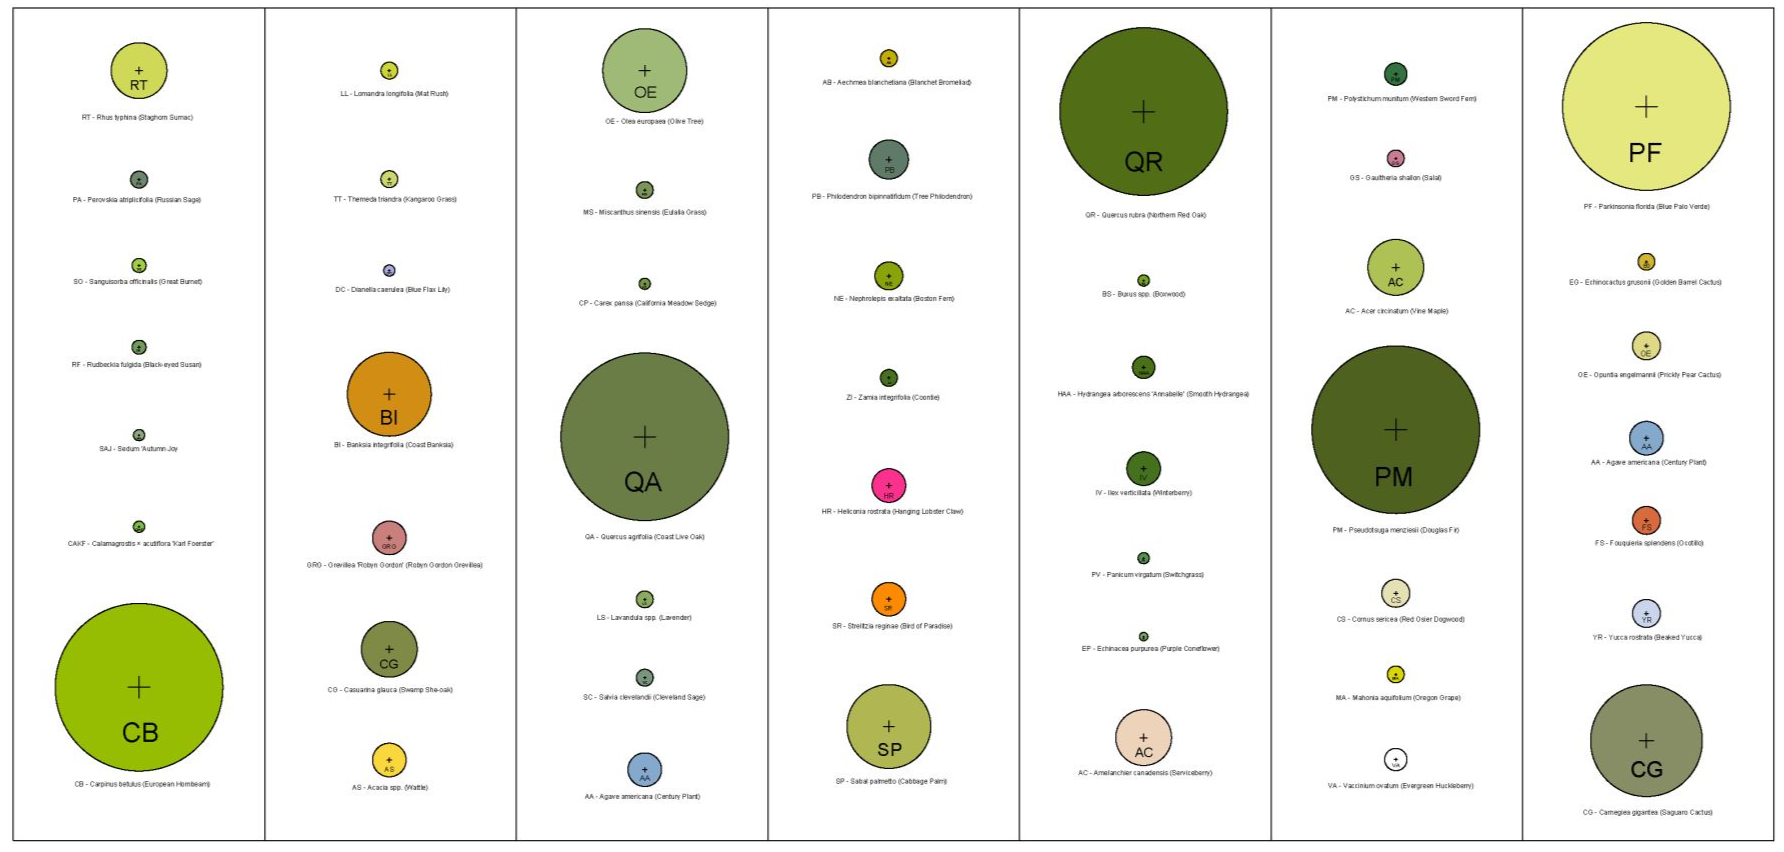
Stone, brick, concrete, wood, gravel, metal, and glass each contribute to the visual identity of the project. Applying realistic materials helps communicate scale, craftsmanship, and architectural style before construction begins. Consistent material selection also creates stronger renderings that align with the overall design vision.

Place Planting

Trees, shrubs, ornamental grasses, and perennial masses add depth and soften the built environment. Rather than modeling every individual branch or leaf, planting should communicate overall composition, height, texture, and seasonal character. This approach creates convincing landscapes while keeping the model efficient.

Add Furniture and Lighting

Outdoor furniture, fire features, planters, lighting fixtures, and decorative accessories help clients understand how the landscape will function in everyday use. These elements introduce human scale while reinforcing the intended lifestyle of the project. Thoughtful placement creates scenes that feel both realistic and inviting.

Learn Rhino for 3D Landscape Modeling and Photorealistic Renderings

Create Photorealistic Renderings

Rendering plugins transform the 3D completed model into photorealistic images that communicate atmosphere, material quality, and spatial experience. Instead of focusing solely on technical accuracy, this stage emphasizes emotion and visual storytelling. Well composed renderings allow clients to experience the design long before construction begins.

Set Camera Views

Camera placement determines how viewers experience the landscape and where their attention is directed. Selecting meaningful perspectives highlights important design features while creating a natural sense of movement through the project. Strong camera composition often has a greater impact than adding additional model detail.

Control Lighting

Lighting establishes depth, shadow, and visual contrast throughout the rendering. The position of the sun influences how materials appear while shaping the mood of every image. Thoughtfully controlled lighting creates renderings that feel believable and professionally composed.

Add Environmental Atmosphere

Sky conditions, reflections, surrounding context, and weather all contribute to the realism of the final image. Atmospheric effects help the rendering feel connected to a real location rather than existing as an isolated digital model. These subtle details often have the greatest impact on the quality of the final visualization.

Build Client Presentations in Adobe InDesign

A great rendering deserves an equally professional presentation. Adobe InDesign brings together plans, renderings, diagrams, material palettes, and project information into a cohesive document that is easy for clients to understand. Rather than focusing on individual images, this stage focuses on communicating the complete design with clarity and confidence.

Organize the Project Story

Every presentation should guide the client through the project in a logical sequence. Beginning with the site plan before introducing perspective views helps explain how the design functions before showcasing how it looks. A clear narrative makes complex landscape projects easier to understand.

Combine Plans and Renderings

Construction drawings and renderings each communicate different aspects of the design. Placing them together allows clients to connect the technical layout with the three dimensional experience of the finished landscape. This combination improves communication while reducing questions during presentations.

Add Materials and Project Information

Material palettes, planting images, precedent photography, and project notes provide valuable context that renderings alone cannot communicate. Including these supporting graphics helps clients better understand the intended character, finishes, and overall design direction. The result is a presentation that feels complete and professionally curated.

Create a Professional Presentation

Consistent page layouts, typography, spacing, and graphics give every project a polished appearance. A well designed presentation reflects the same level of quality as the landscape itself while reinforcing confidence in the proposed design. This final stage prepares the project for client meetings, design reviews, and portfolio publication.

Learn How to Create Client Presentations

How Can I Learn This Process?

Learning this workflow is less about mastering individual software programs and more about understanding how they work together.

Inside the Ultimate Bundle, you'll learn the complete professional process from hand sketching and AutoCAD drafting to Rhino modeling, Enscape rendering, and Adobe InDesign presentations.

Rather than teaching isolated software features, each course builds on the previous one using real residential landscape projects, giving you a repeatable workflow you can apply to your own designs from concept through client presentation.

From 2D to 3D — Learn the Top Software for Landscape Design

Frequently Asked Questions

How do you turn a 2D AutoCAD drawing into a 3D model?

The process begins with a clean and organized AutoCAD drawing that is imported into Rhino. The 2D linework becomes the foundation for building terrain, hardscape, buildings, planting areas, and other landscape features. Once the model is complete, it can be rendered and presented to clients.

Why should I design in 2D before moving to 3D?

2D drawings make it easier to solve layout, circulation, and space planning before investing time in modeling. Design changes are much faster to make in AutoCAD than after geometry has been built in three dimensions. Starting in 2D creates a stronger design while significantly reducing revisions later in the workflow.

What is Rhino used for in landscape design?

Rhino is a professional three dimensional modeling software. It allows landscape designers to model terrain, pools, retaining walls, pergolas, architecture, and other site features before creating renderings. Rhino serves as the bridge between technical drawings and realistic visualization.

Can I create a 3D landscape model directly in AutoCAD?

AutoCAD includes three dimensional tools, but it is primarily designed for drafting and construction documentation. Most professional landscape designers use AutoCAD to create accurate plans before moving into Rhino for modeling. This workflow is more efficient and provides greater flexibility when developing complex site geometry.

What software is used after Rhino?

After the three dimensional model is complete, it is typically imported into rendering software such as Enscape to create photorealistic images. Those renderings are then organized into professional client presentations using Adobe InDesign. Each software focuses on a specific stage of the design and visualization process.

Do I need to know AutoCAD before learning Rhino?

Having a solid understanding of AutoCAD is highly recommended because it establishes the technical foundation for the model. Accurate drawings make the transition into Rhino much faster and reduce modeling errors. Learning AutoCAD first also creates a workflow that closely matches professional landscape architecture practice.