Apr 23 • Jordan Felber
The Complete Landscape Design Workflow: From Survey to Final Rendering
Related — The Ultimate Bundle

Landscape design is often misunderstood as a series of disconnected tasks such as sketching, drafting, modeling, and rendering.
In practice, it operates as a continuous system where each phase builds directly on the last, translating ideas into precise, buildable outcomes.
From the first imported survey to the final rendered image, the workflow is not defined by software, but by how information evolves.
Each step refines clarity by moving from abstraction to resolution and from concept to construction.
What follows is the complete landscape design workflow used by professionals to move from a blank site to a fully realized proposal.
1. Document Existing Conditions
Every project begins with the accurate documentation of the site. This is the foundation upon which all design decisions are made.
A survey, whether provided by a civil engineer or generated on site, must be imported into CAD at a true 1:1 scale. Units, alignment, and orientation are verified immediately, ensuring that distances, elevations, and boundaries reflect real-world conditions.
From there, the drawing is cleaned. Unnecessary linework is removed, layers are simplified, and critical information such as property lines, structures, and contours are isolated. What remains is a legible base that reveals both the constraints and opportunities of the site.
At this stage, the designer is not yet designing, but understanding. Topography, drainage patterns, and spatial relationships begin to inform what is possible.
2. Build the Base Plan
With the survey in place, the next step is to construct a working drawing that supports clarity and precision. This involves organizing the file using a disciplined layer system, typically separating landscape, architectural, and annotation elements.
Lineweights are assigned to establish hierarchy, ensuring that primary geometry reads clearly while secondary information remains supportive.
Layouts are prepared with appropriate scales, allowing the drawing to translate cleanly to paper or PDF. This is where the file begins to take on a professional structure, setting the stage for all future work.
A well-built base plan is not visually impressive, but it is essential. It removes friction from the process and allows the designer to move quickly and confidently in later stages.
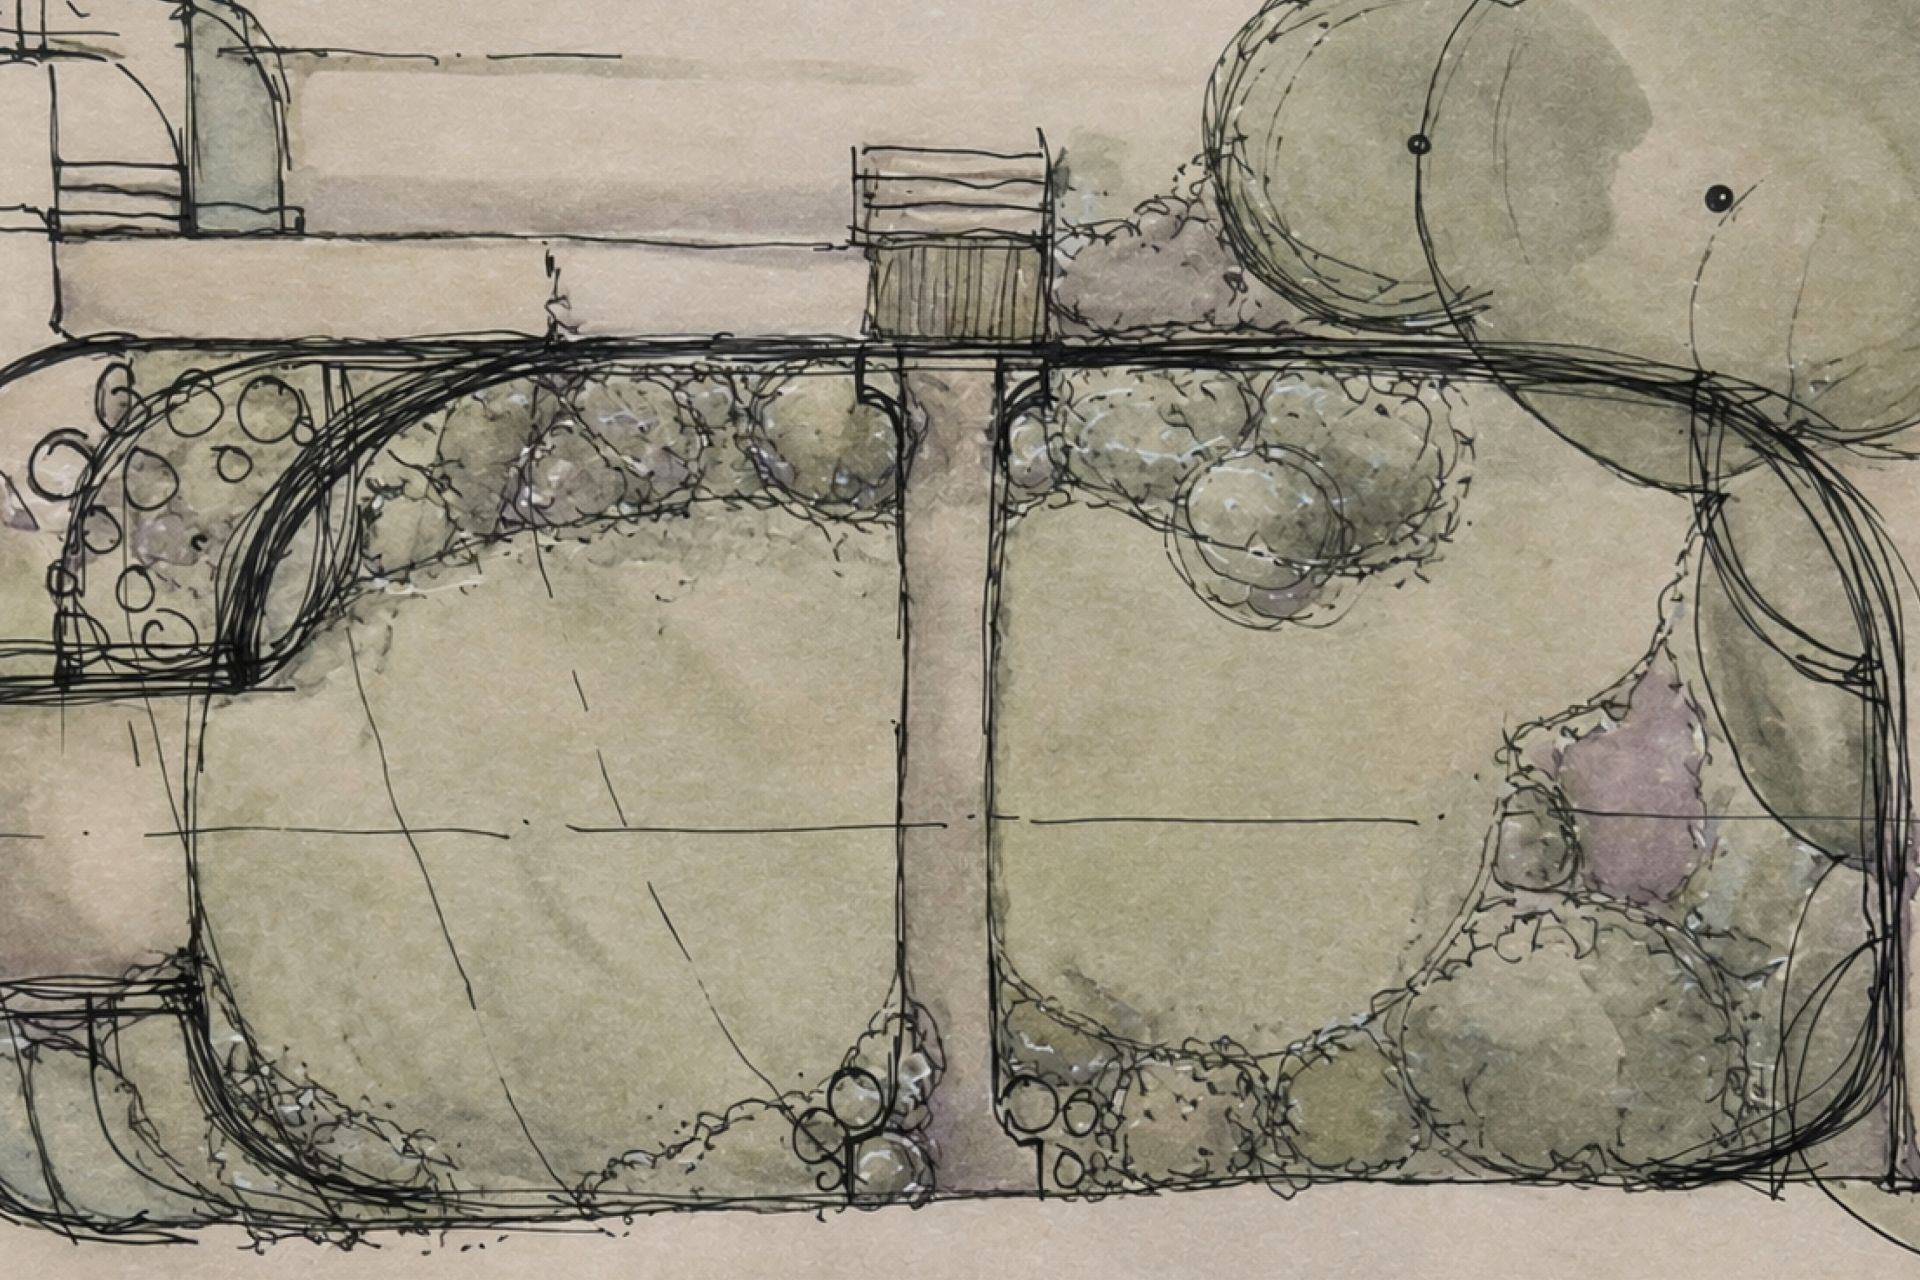
3. Conceptual Design (Sketch First)
Before precision, there must be exploration.
Sketching remains one of the most effective tools in landscape design, not for presentation, but for thinking. Working over a printed base plan or digital underlay, designers can quickly test spatial ideas without the constraints of software.
Circulation paths, outdoor rooms, planting zones, and focal elements are explored in loose form. Iterations happen rapidly. Ideas are added, removed, and refined without concern for exact dimensions.
This phase prioritizes speed and clarity of intent. It allows the designer to establish the underlying logic of the project before committing to geometry.
CAD is precise, but it is inherently slower for early ideation. Sketching fills that gap.
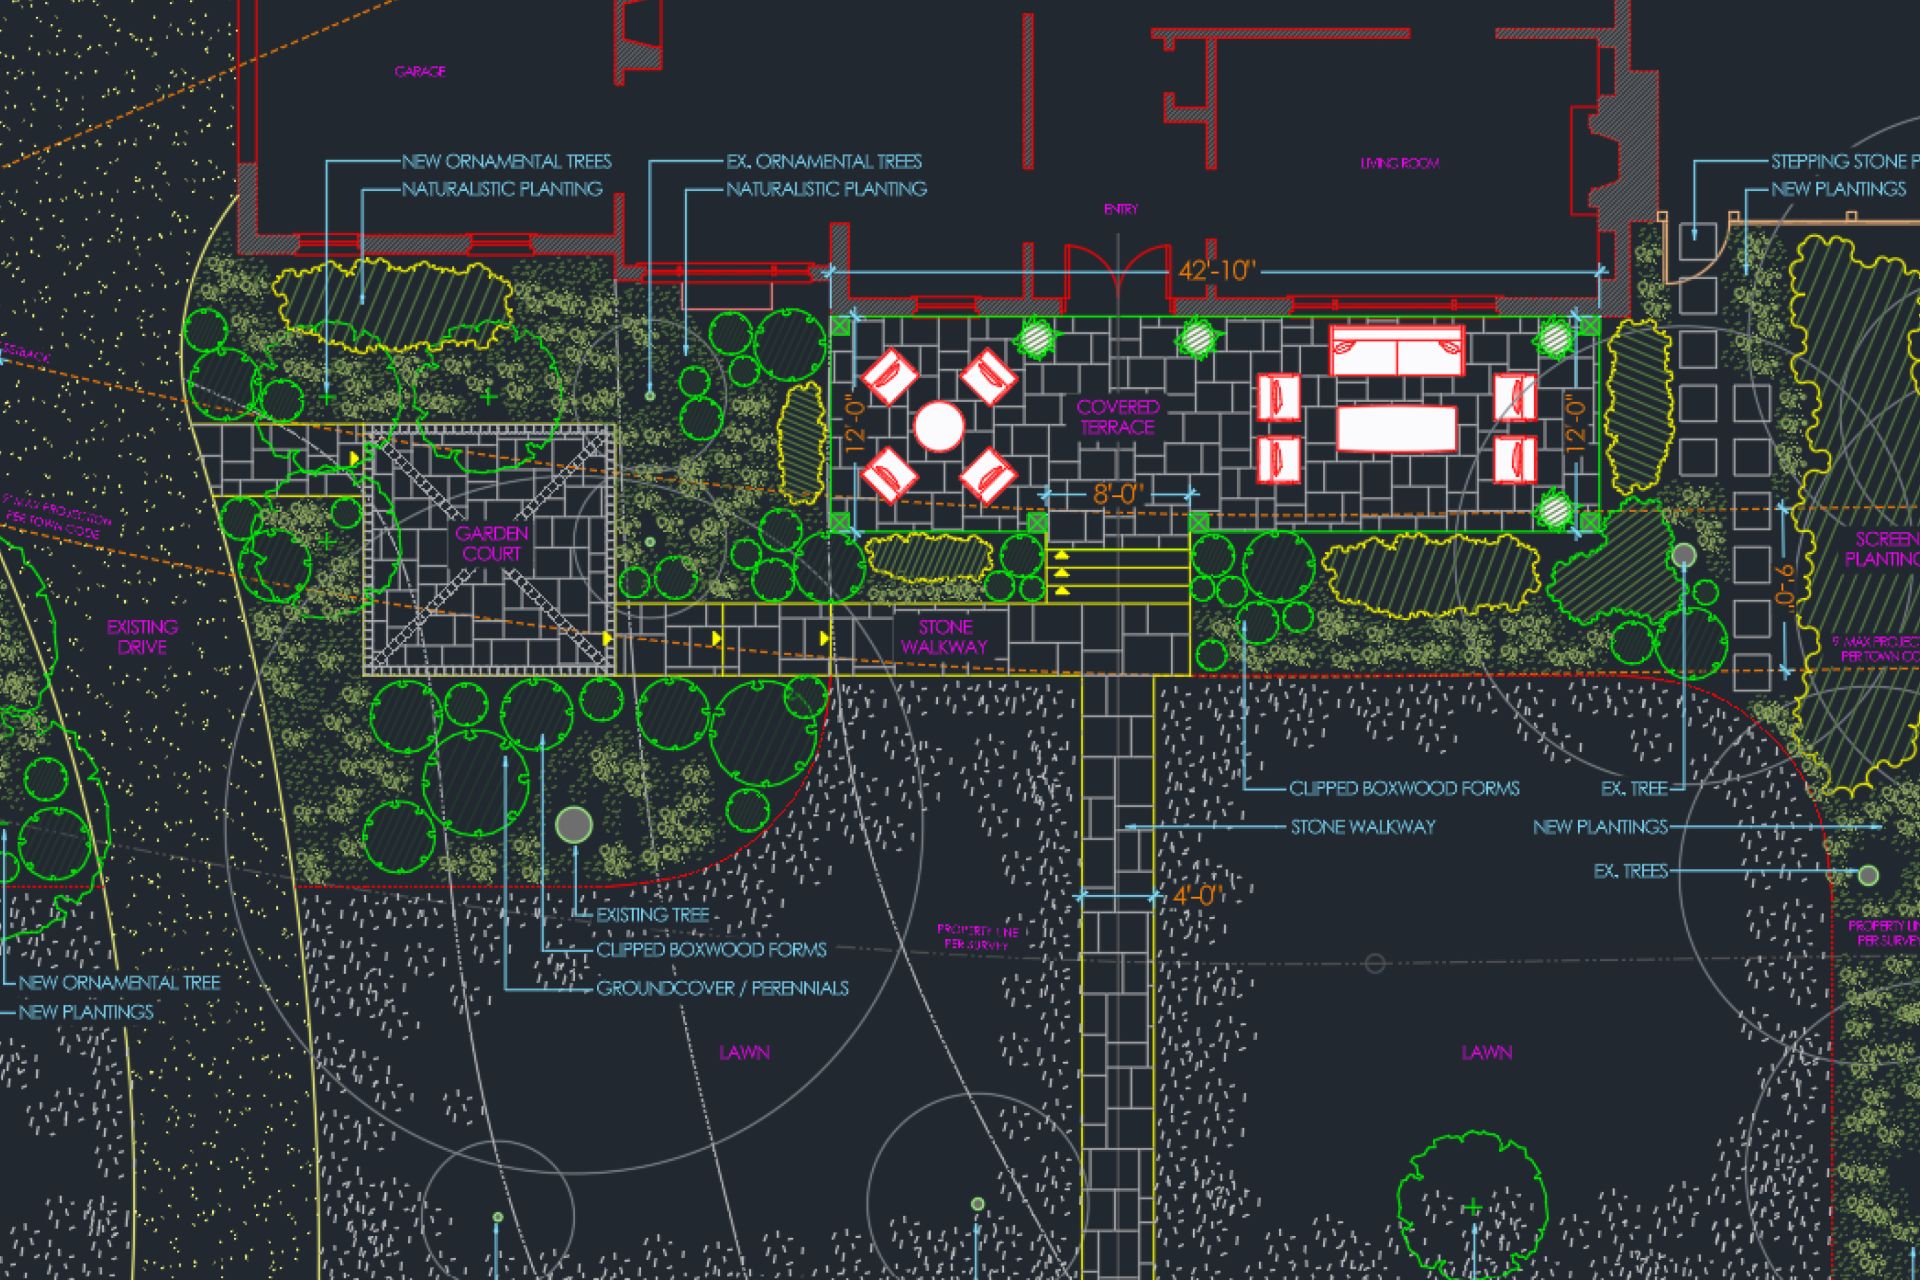
4. Translate Concept into CAD
Once a clear direction is established, the sketch is translated into a scaled, precise drawing.
Hardscape elements such as patios, walkways, walls, and pools are laid out using real-world dimensions. Geometry is refined, alignments are corrected, and relationships between spaces are clarified.
Planting areas are defined as zones, not individual plants at this stage, allowing the overall composition to remain flexible while the structure becomes fixed.
This phase relies on a core set of CAD operations such as drawing, offsetting, trimming, and extending, but the emphasis is not on the commands themselves. It is on using those tools to convert intention into measurable form.
What was once conceptual is now spatially accurate.
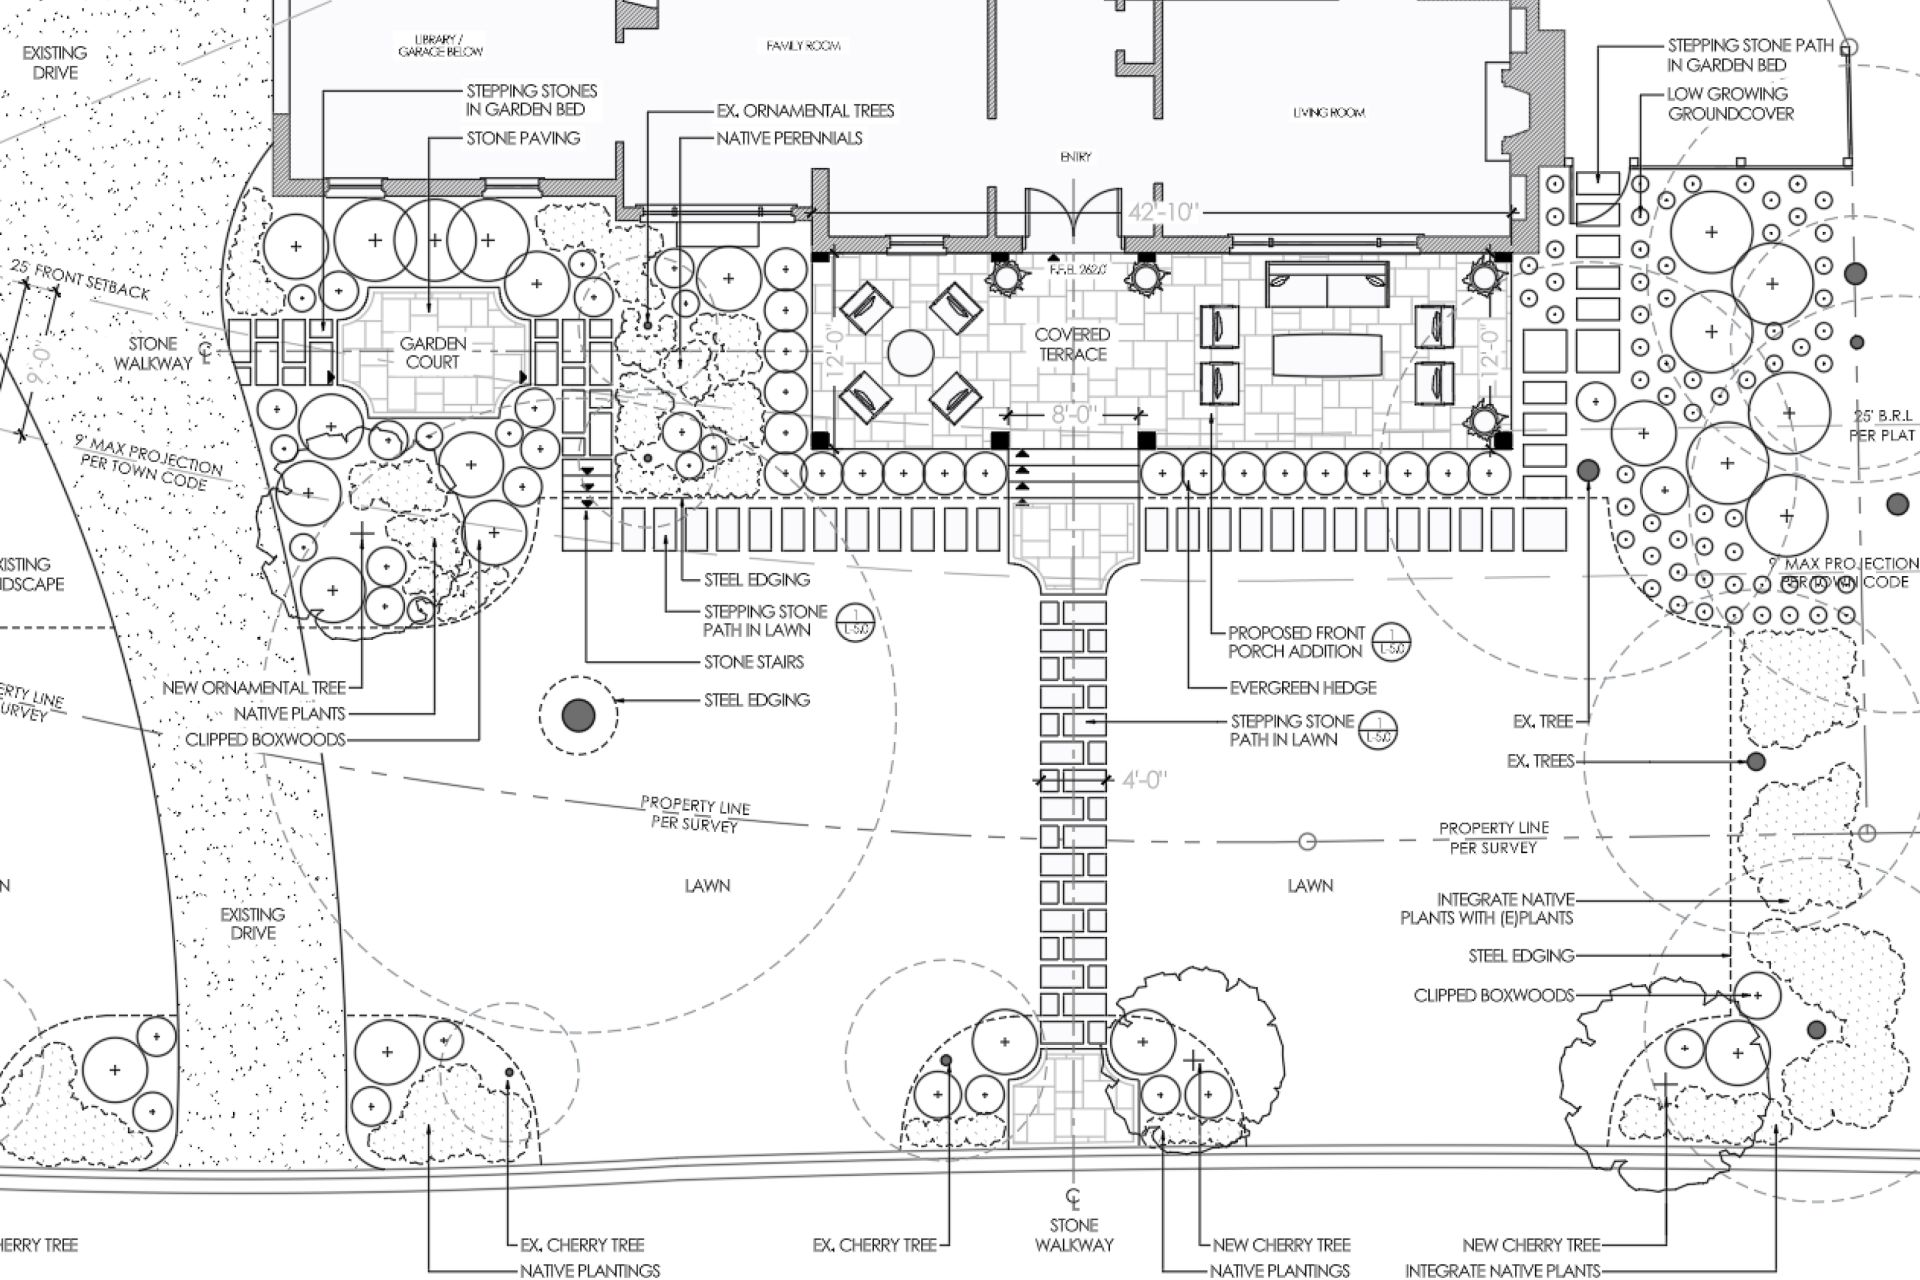
5. Develop the Design
With the primary layout established, the design moves into resolution.
Dimensions are added to communicate scale and proportion. Materials are defined, distinguishing between surfaces such as stone, gravel, or wood. Planting plans begin to take shape, shifting from abstract zones to specific strategies.
Additional drawings may be introduced where necessary, such as simple elevations to clarify vertical elements or sections to understand changes in grade.
This phase transforms the drawing from a design concept into a document that can be understood, priced, and eventually built. It is where decisions become commitments.
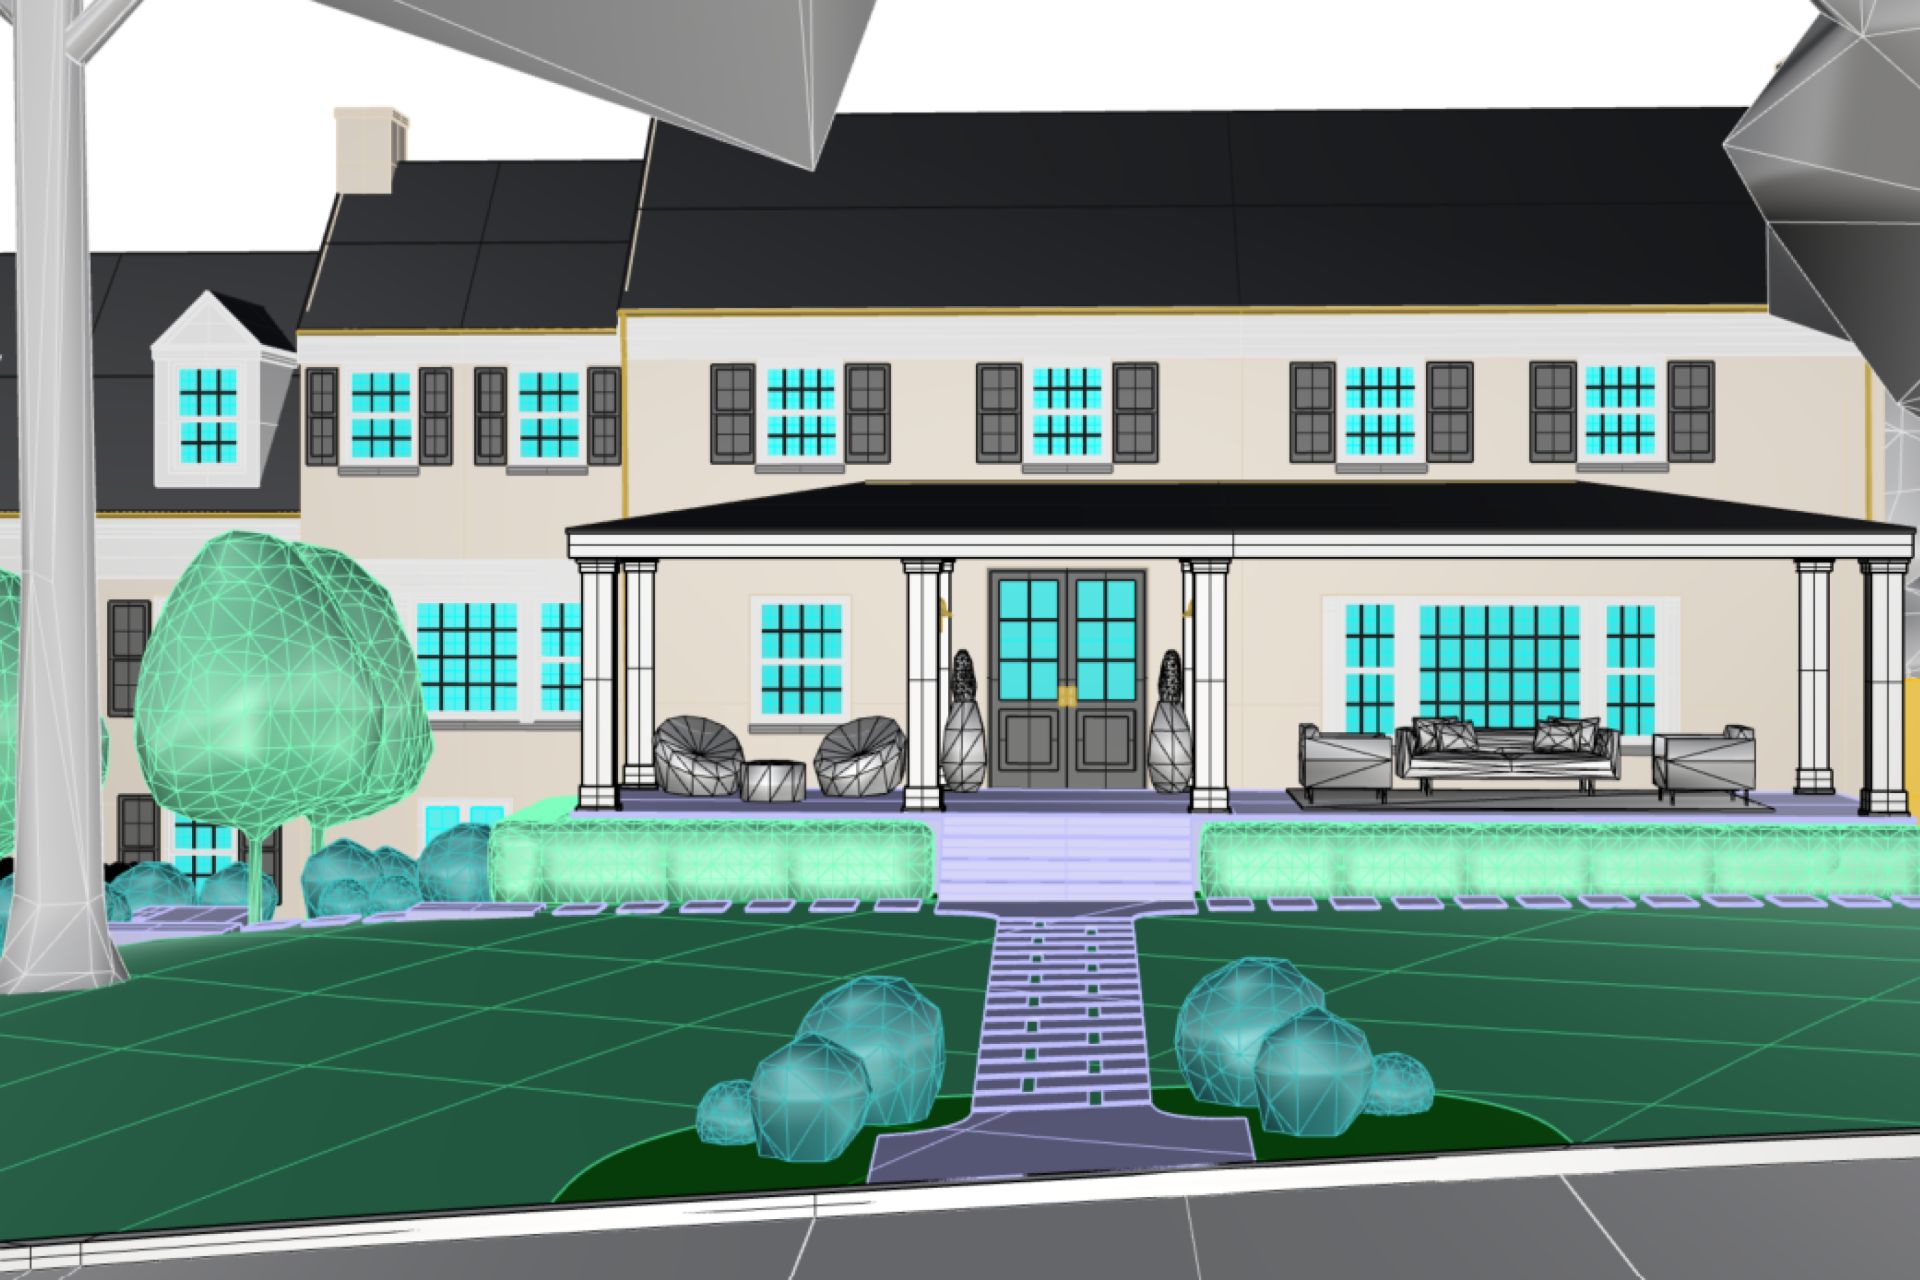
6. Build the 3D Model in Rhino
With a resolved 2D plan, the design is translated into three dimensions.
The CAD file is imported into Rhino, where contours are used to generate terrain. Hardscape elements are extruded or modeled as planar surfaces, establishing the vertical relationships of the space.
This step is less about detail and more about massing and proportion. It allows the designer to evaluate how the project feels in space, how walls define enclosure, how levels shift, and how the design interacts with the horizon.
The 3D model becomes a bridge between technical drawing and visual experience.
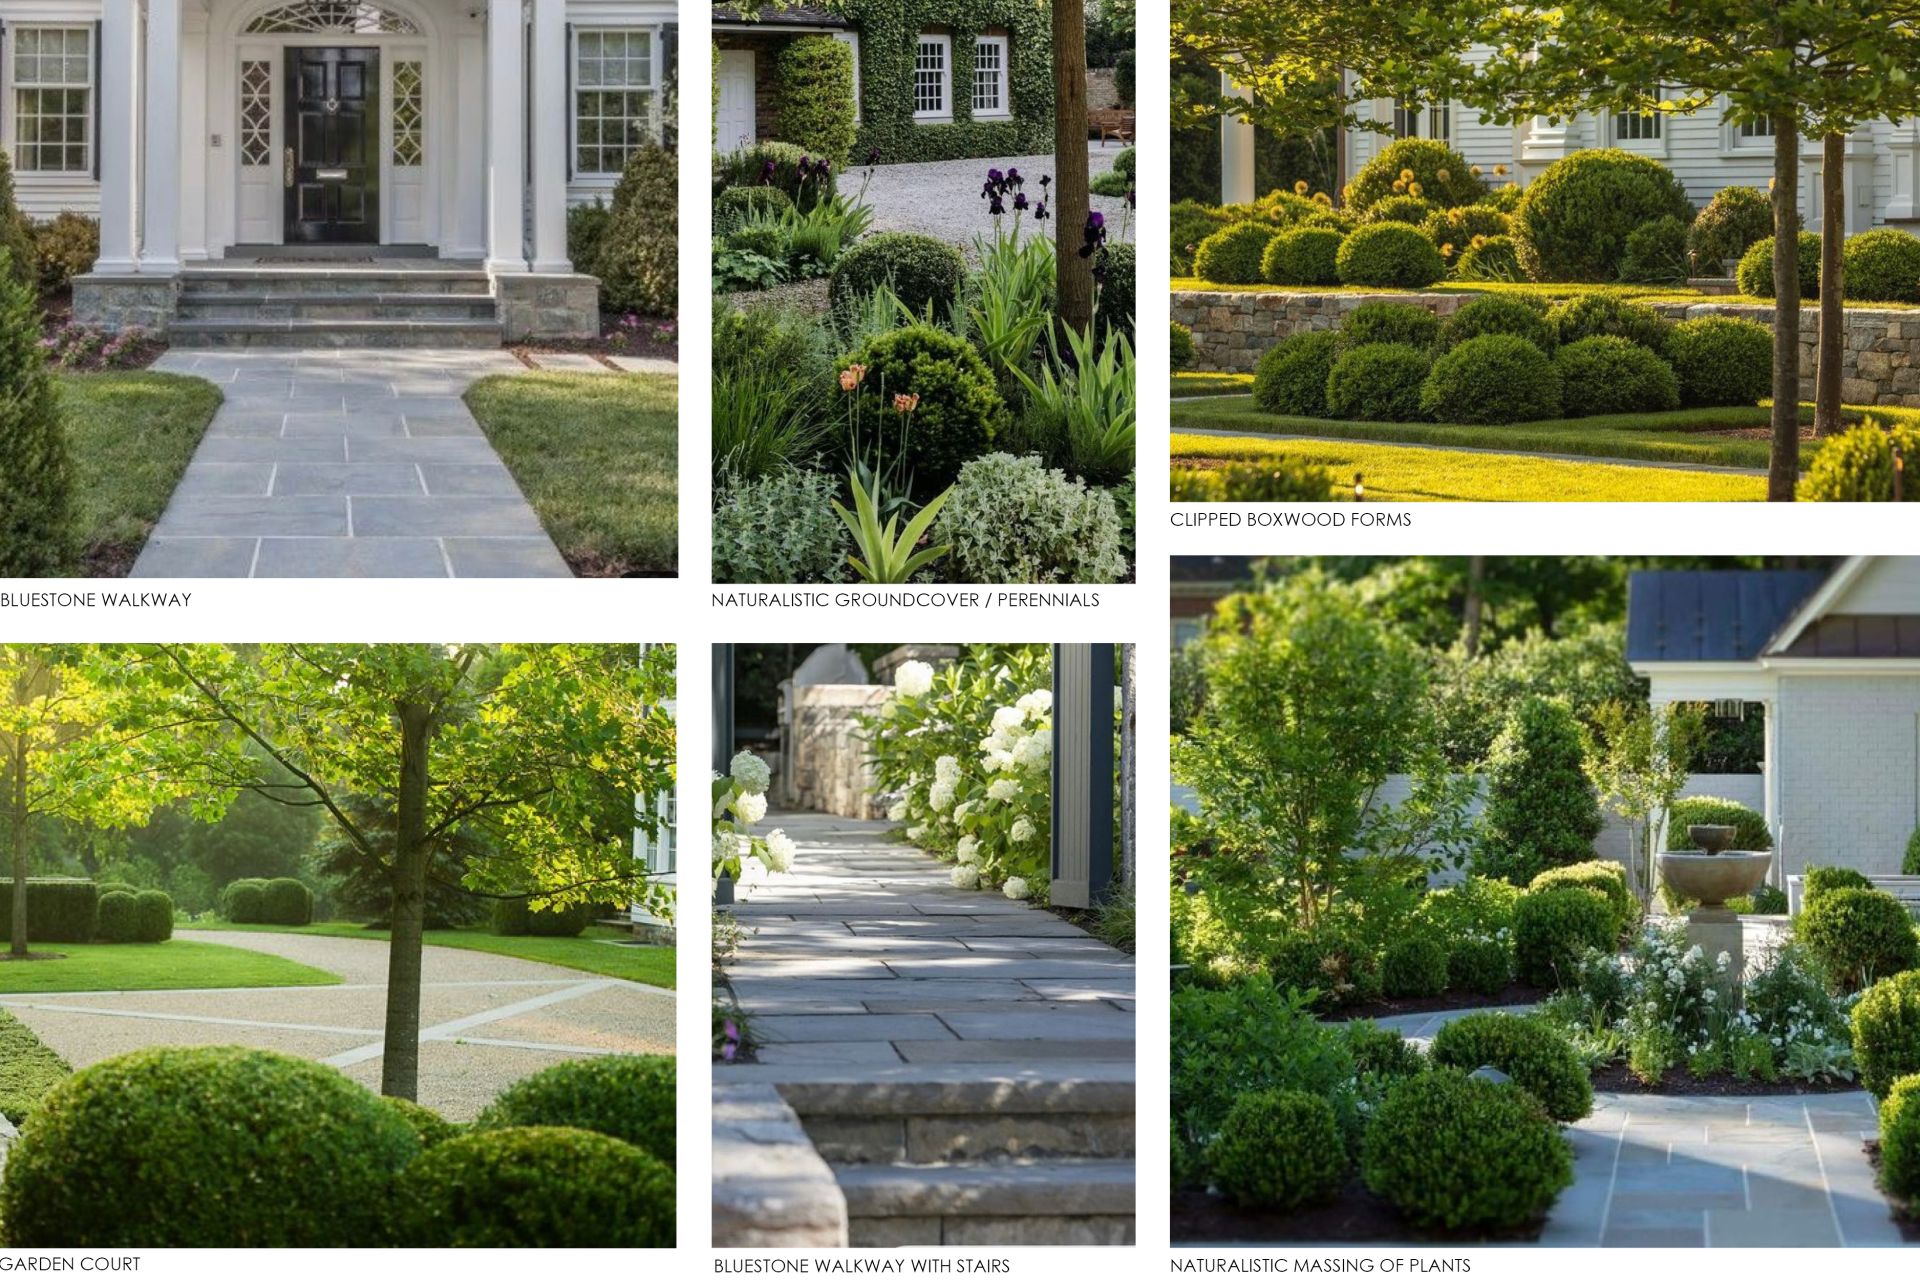
7. Apply Materials and Atmosphere
Materiality gives the model character.
Surfaces are assigned textures that reflect real-world materials such as stone with subtle variation, stucco with depth, and water with reflectivity. These choices align with the design intent and regional context.
Planting is introduced as simplified forms or proxy objects, establishing scale and density without overcomplicating the model.
At this stage, the project begins to move beyond abstraction. Light interacts with surfaces, shadows define depth, and the design starts to feel tangible.
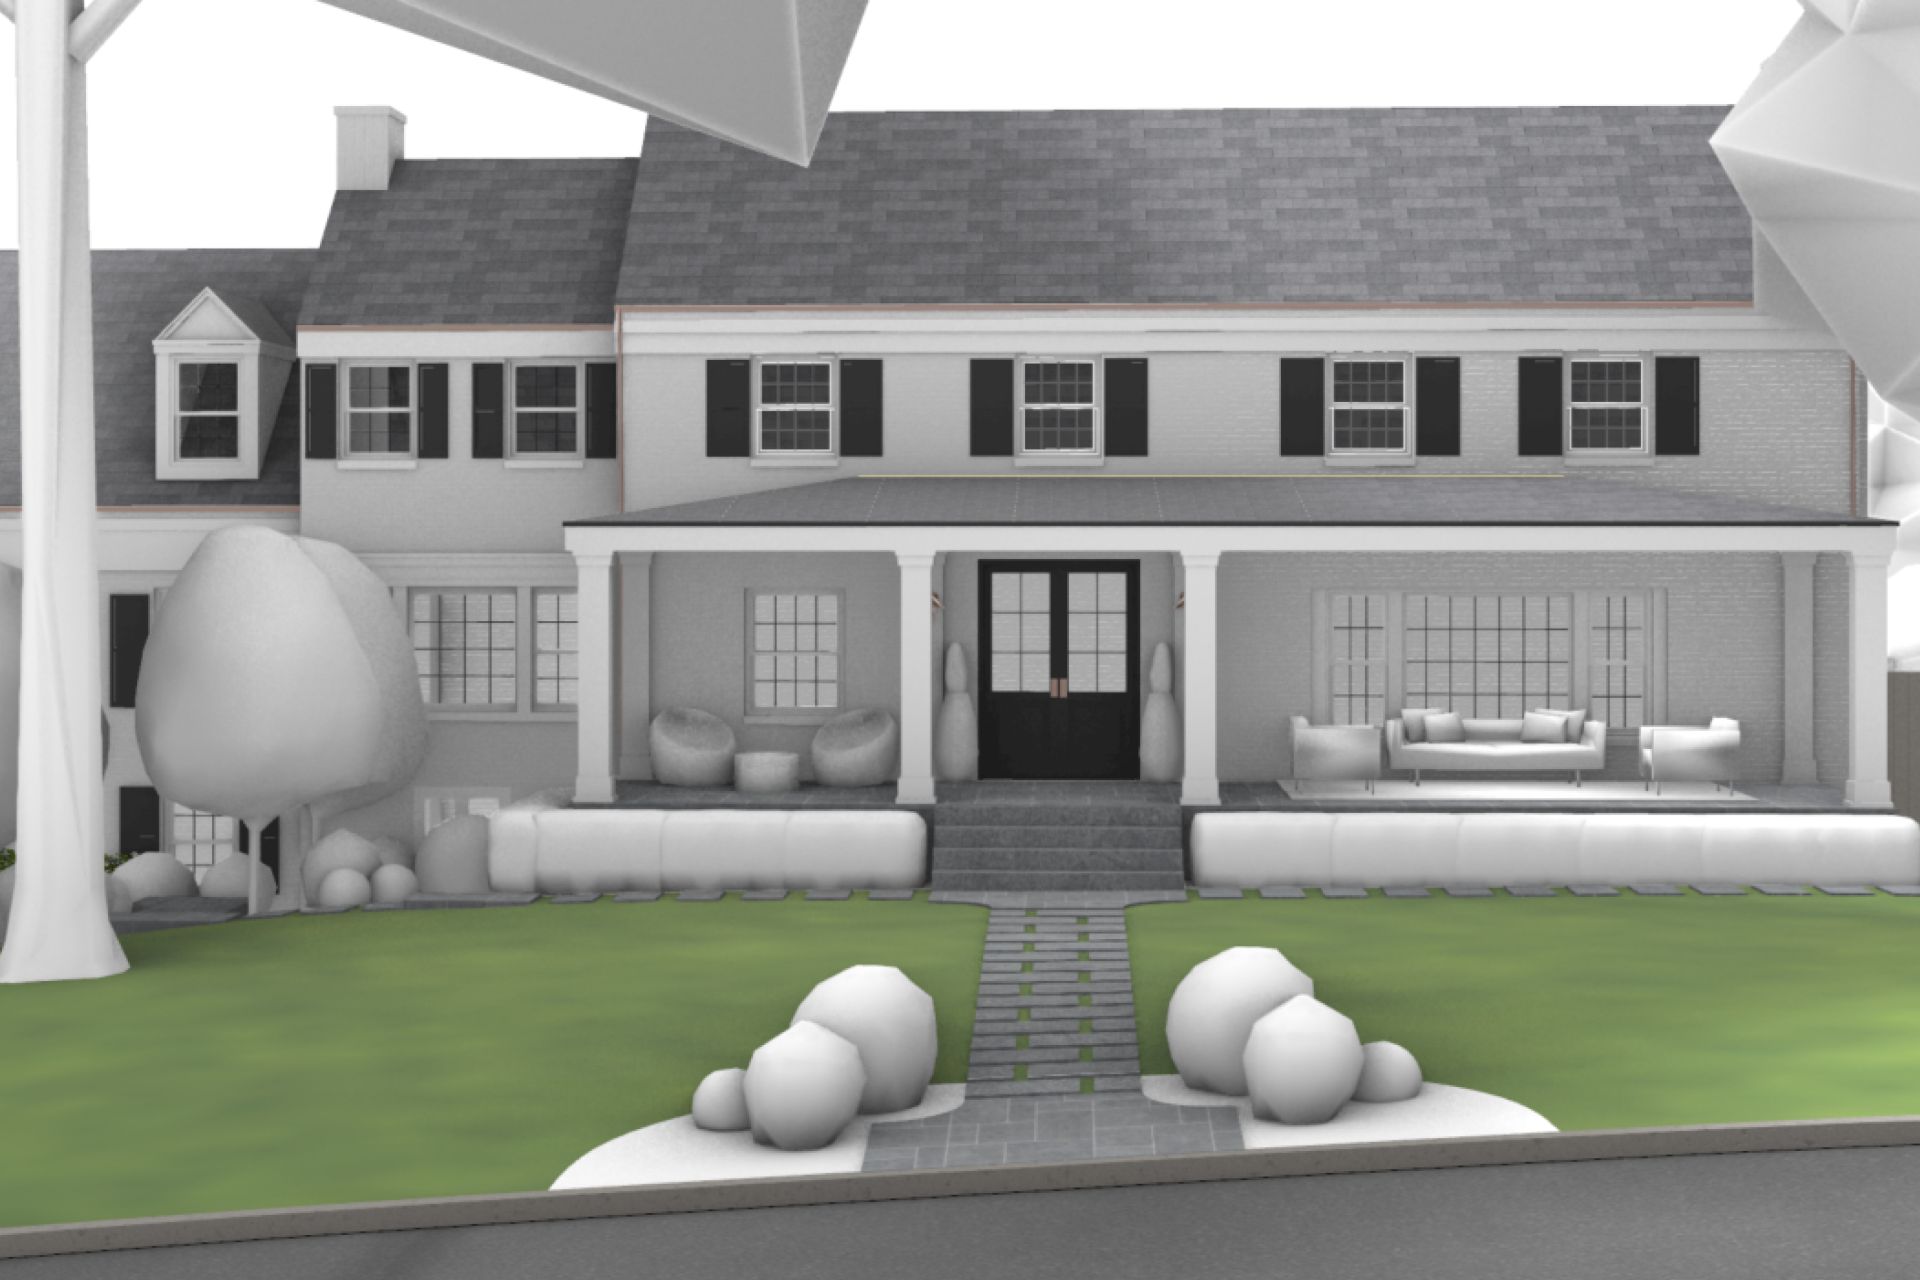
8. Render the Design
Rendering translates the model into an image that communicates the experience of the space.
Using real-time tools such as Enscape, cameras are composed with intention, framing views that highlight spatial relationships, material transitions, and focal elements. Lighting is adjusted to reflect a believable time of day, often favoring soft directional daylight.
The goal is not hyper-realism, but clarity. A successful rendering allows a client or collaborator to understand the design without needing to interpret drawings.
It becomes a shared reference point for discussion and decision-making.
9. Post-Production and Final Presentation
Raw renders are refined through post-production.
Color balance is adjusted, contrast is tuned, and subtle enhancements are introduced to improve depth and realism. Tools such as Photoshop or AI-based workflows can be used to add atmospheric qualities, refine materials, or integrate planting with greater nuance.
These adjustments are controlled and intentional. The objective is not to alter the design, but to present it with clarity and precision.
The final images, combined with plans and supporting drawings, form a cohesive presentation that communicates both vision and feasibility.
10. Deliverables and Communication
The final step is not rendering. It is communication.
A complete landscape design package typically includes a combination of plans, diagrams, and visualizations. Each serves a different purpose. Plans guide construction, while renderings convey experience.
Clarity is critical. Contractors rely on dimensions, materials, and layout accuracy to build the project. Clients rely on visuals to understand and approve the design.
When executed correctly, the workflow results in a seamless transition from idea to implementation. The drawings are not just representations. They are instructions.
The Landscape Library Academy is an online platform teaching landscape professionals, students, homeowners and enthusiasts how to design landscapes and master software for the field.
The Landscape Library Academy is the education division of The Landscape Library.
Click here to visit TheLandscapeLibrary.com for media including education articles, projects features and more.
The Landscape Library Academy is the education division of The Landscape Library.
Click here to visit TheLandscapeLibrary.com for media including education articles, projects features and more.
Copyright © 2025


